The first one is easy to fix. Just buy a new RAM stick and install it. The memory leak can be tricky. We need to first diagnose the reason behind the memory leak in Windows before troubleshooting to fix the issue. Let’s begin. Content
Memory Leaks in Windows
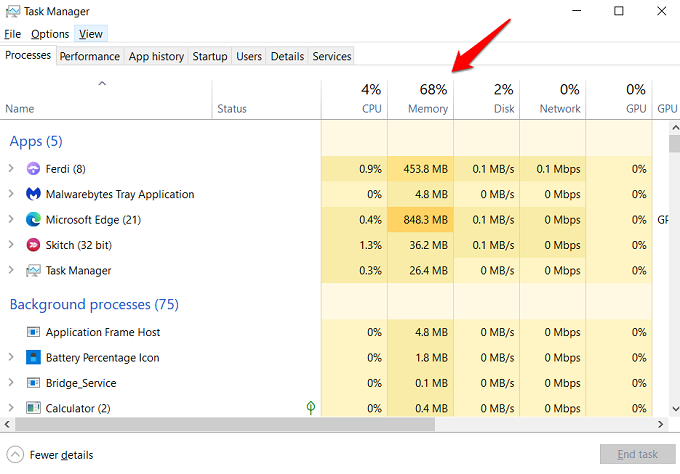
Press Ctrl+Shift+Esc keys on your keyboard to open the Task Manager. Under the processes tab, you will see every app and service running on your computer currently. In my case, 68% of memory has been taken and most of it is due to two apps that I have open. Edge browser and Ferdi which is an open-source wrapper that helps me run 10s of messaging apps in a single interface. Quite resource intensive. So, I know where my memory is being used, and closing these apps would release memory back into a common pool for other apps to consume. When an app is using more memory than what is required or when a large amount of memory is unaccounted for, it is called a memory leak. So, how do we diagnose memory leak in Windows and fix it? Also Read: How to Check How Much RAM You Have on Windows
RAMMap from Microsoft
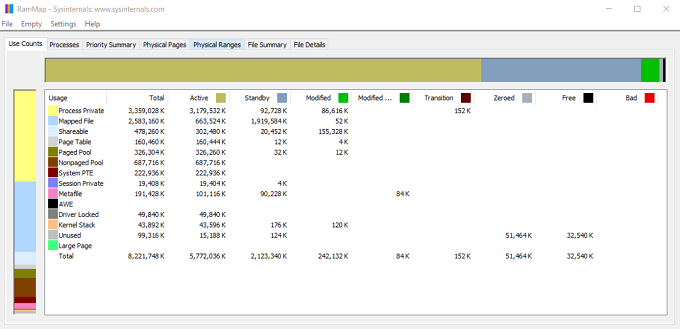
RAMMap was developed by Microsoft to map the physical RAM installed on your device and understand where all the memory is being used. It will break down usage information and display it category-wise like so. Download: RAMMap Below are several methods you can use to fix memory leaks in Windows 10 PC.
1. Reboot Computer
You can also use the RAMMap tool above to clear memory without having to reboot the computer. If not, save all work and reboot your computer. This will close all running apps and services and give the computer a fresh start.
2. End Process or App
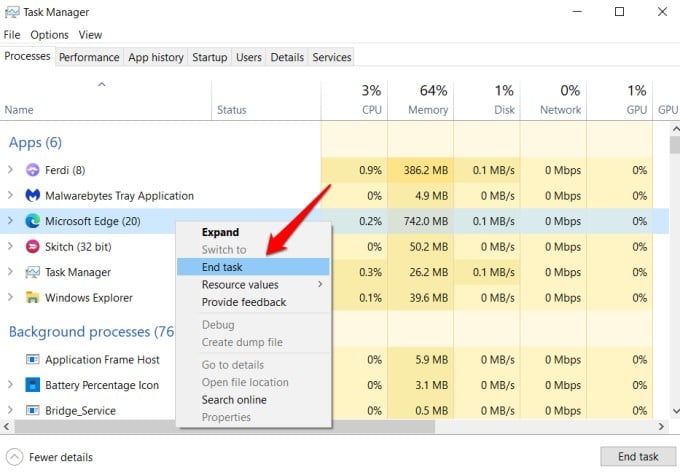
Open the Task Manager again using the keyboard shortcut we shared above and right-click on the process or app that is consuming the most memory. Select End task from the menu that appears.
3. Check Resource Monitor
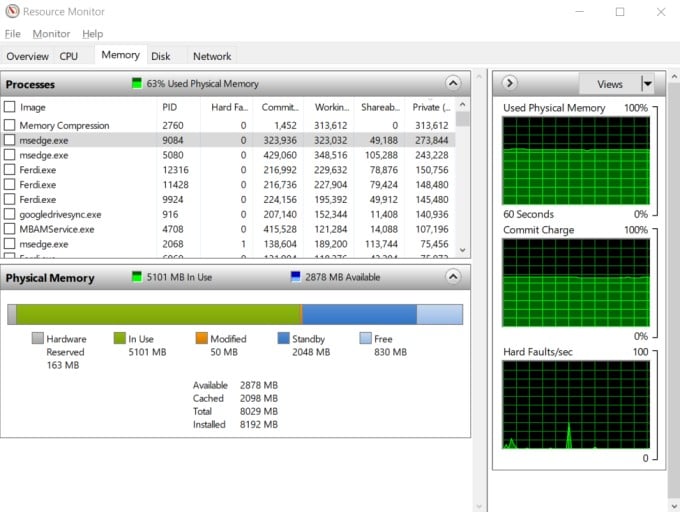
Another app you can use to diagnose memory leaks is Resource Monitor which comes pre-installed on all Windows computers. You can search for it in Windows Search. Click on the Memory tab to check for weird behavior where an app or service is consuming too much memory or signs of memory leak.
4. Use Windows Memory Diagnostic Tool
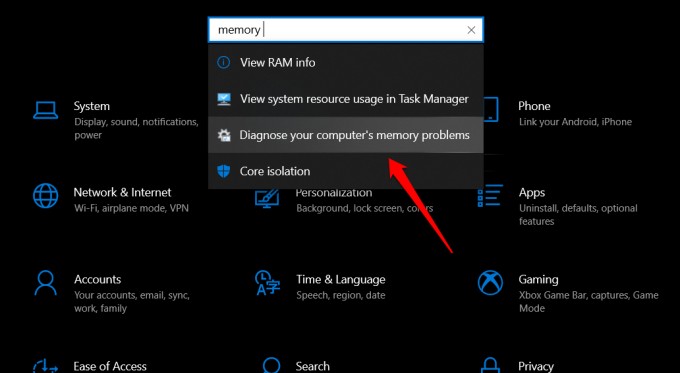
Press Windows key+I to open Settings and search for ‘Diagnose your computer’s memory problems‘ and open it. In the pop-up window that follows, you can either choose to run the memory diagnostic tool immediately (requires reboot) or the next time the computer reboots. You may see a blue screen the next time at startup. Also Read: 15 Best Lightweight Browsers for Windows 10
5. Scan for Malware and Virus
It is possible that a hidden virus or malware is using memory in the background to steal your data. You can use the default Windows Defender or your favorite antivirus app to perform a full scan. We would also recommend you to check out Malwarebytes. Why? Because the virus is not the same and malware. Also, try adware cleaner. Download: Malwarebytes Download: AdwCleaner
6. Disable Unnecessary Startup Apps
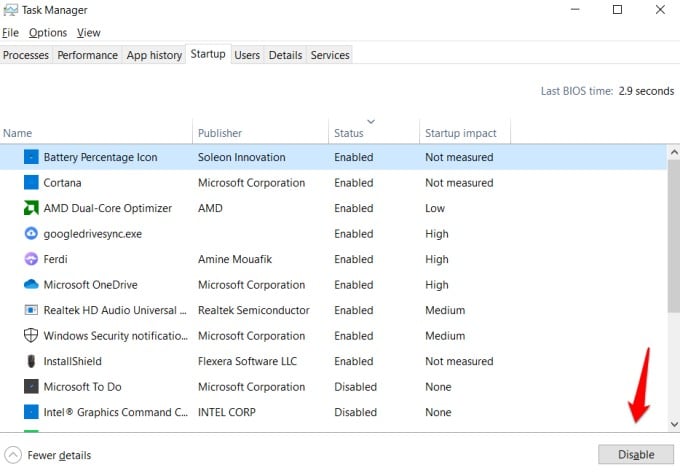
When you boot Windows computer, there are a lot of apps and programs that open and run in the background. Some of these apps you are not using actively or don’t even know about. Disabling these apps would free system resources including memory. Press Ctrl+Shift+Esc keys to open the Task Manager and select the Startup tab. Go through the list and select the app that you don’t want to launch at startup. Click on Disable at the bottom right corner.
7. Enable Adjust for Best Performance
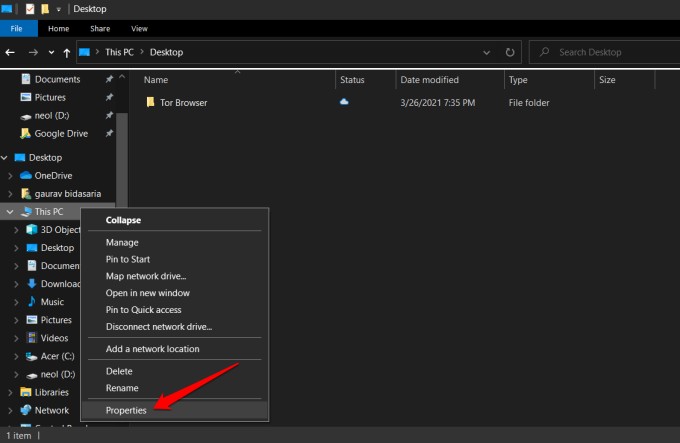
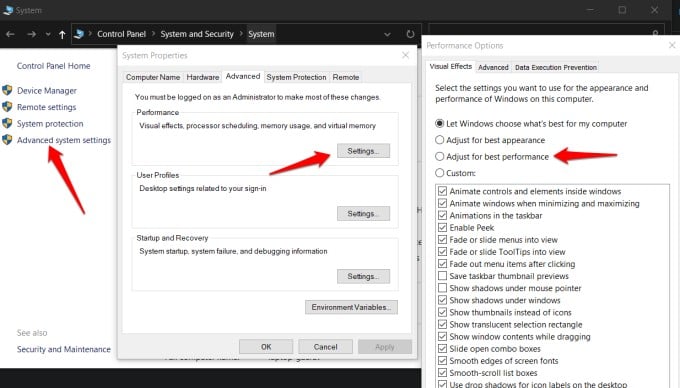
Open File Explorer, right-click on This PC in the sidebar, and select Properties. You can also open Control Panel > System and Security > System. In the Control Panel, click on Advanced system settings in the left sidebar. In the pop-up that follows, select Settings under the Advanced tab. Another pop-up will launch where you should select the ‘Adjust for best performance‘ option and save all settings.
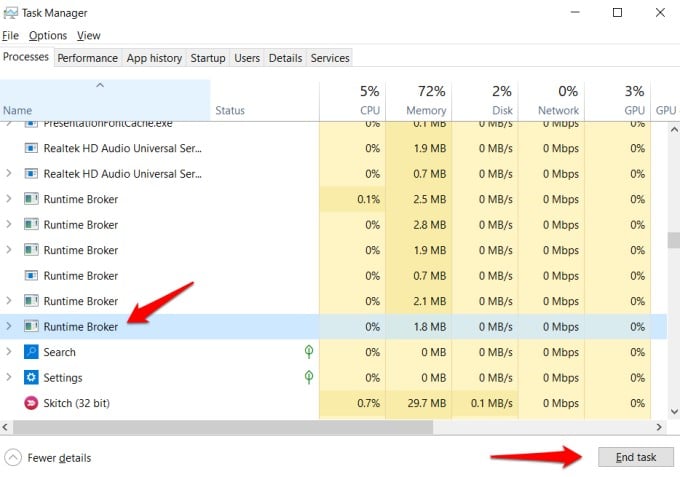
8. Disable Runtime Broker
Runtime Broker was designed by Microsoft to track permissions on Windows computers. It is often found using a lot of memory for no apparent reason. Ideally, it should be using a very little amount of memory. You can check in the Task Manager or in one of the other apps we shared above. Open the Task Manager again, find Runtime Broker under the Processes tab, right-click on it and select End task. The real problem is not fixing a memory leak but diagnosing it. Once you know the cause of the usual spike in memory usage or unaccountable memory, it is easy to fix. That’s why we shared diagnosing tools right at the beginning. It is important that you get familiar with these tools. Notify me of follow-up comments by email. Notify me of new posts by email.
Δ